Jewelry I
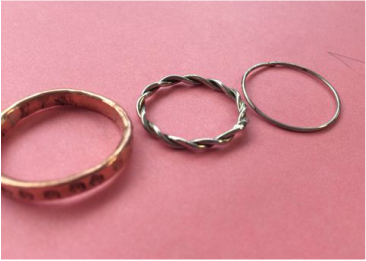
Jewelry I is wrapping up the Plain, Twist and Texture Band project. Each of the rings comes with it's unique set of challenges. The Plain band develops basic soldering, joint clean up, and buffing skills. In the twist band, students must match up the two wires on each end to pass the 'light' and 'feel' tests, but must also continue the movement of the twist by keeping the pattern of the twist through the joint and ensuring the torque is correct for the individual wires. Finishing is also more challenging as the students must manipulate the ring against the edges of the buffing wheels to get into all the cracks and spaces. In the texture band, we learned how to accomodate for the thickness of the ring stock to create a blank (ring measurement) of the appropriate size. To get the right measurement, we measure use the diameter of the ring size, add the thickness and multiply times Pi to get the appropriate length-a great challenge for the week given that Monday was Pi day!
 |  |
Ceramics I
Ceramics I finished their drums this week with burnishing and terra sigilatta. Both are age old techniques for compressing and partially sealing the clay surface. The result is a semi-sheen surface that brings the finest clay particles to the surface. In burnishing, a spoon, rock, or other hard smooth object is rubbed against the clay's surface in small circles until the surface feels tight and rubbery. The hard, smooth surface of the object pushes the coarse particles of clay down, allowing the finer particles to sit on the surface. It is both meditative and additive:) Modern terra sigilatta is similar to the slips that the Greeks used to finish their Red- and Black-figure pottery. In modern terra sig, soda ash and sodium silicate are used to help a clay slip separate into 'bands' by particle size. The water is then siphoned off the top, and the middle portion of fine particles are siphoned out of the middle. These are painted onto dry leatherhard or bone dry clay, then polished with a smooth plastic bag, which bunishes the fine layer of slip. After two to three coats the pot feels soft and silky. The resulting finish has a satin sheen, even after firing, that can be accentuated by the application of wax to the surface. Both finishes will be sawdust fired, creating smoky, cloudy looking patterns on the pots surface.
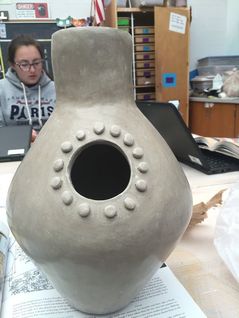 Alina's drum with burnishing complete | 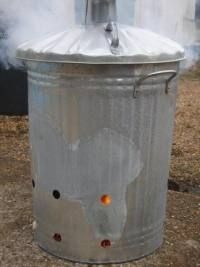 how the pots will be fired to create the smoky cloudy looking patterns | 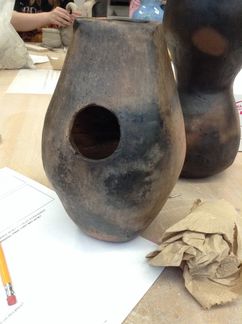 student drum from last term, showing smoke firing on red clay |
Ceramics II
Ceramics II students are well underway on their vases/pitchers/teapots assignment. There are two main objectives for this project: learning how to center and move larger amounts of clay (4-5 lbs instead of 1-3 lbs), and learning how to attach multiple wheel thrown parts to make larger, and more complex vessels. With throwing, people tend to plateau around 4", then hit another around 6", and so on until eventually, they really learn how to pull the clay. Each of the students of Ceramics II is going to break her threshold, and a few examples of students who plowed through theirs recently are pictured below! This was within just a couple sessions of learning the 'claw' a method that I share for rotating from the pads of the finger tips to the end of the finger tip to increase throwing power and control. Whew-hew Ceramics II!!
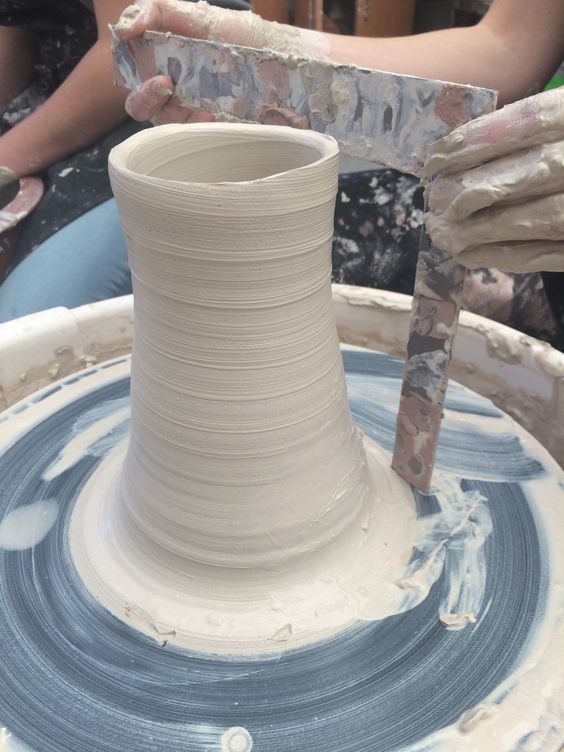 Olivia, almost clearing 8"! | 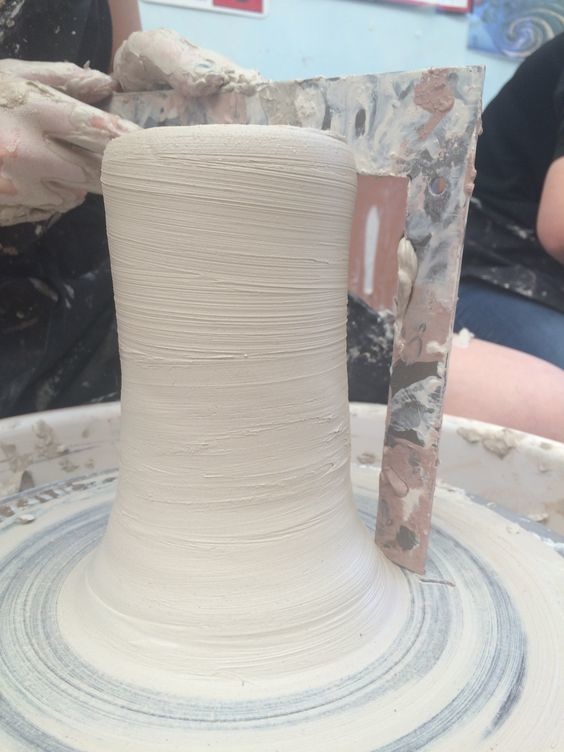 Lian, almost clearing 8"! | 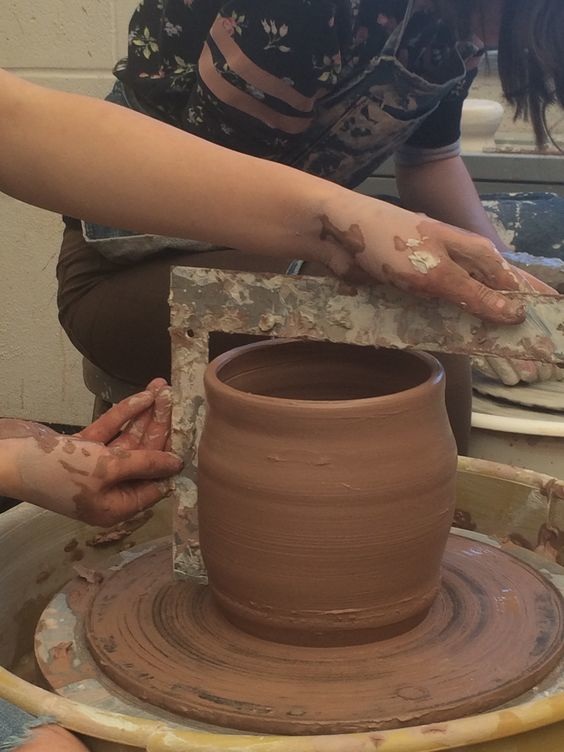 Eun-jai, with a wide form almost clearing 8"! |
 RSS Feed
